3D Printing

5153 readers
29 users here now

For everyhting 3D printing related.

Please be excellent to each other :)

Icon by Freepik, Banner photo by Thiago Medeiros Araujo

founded 5 years ago
MODERATORS
1
1
submitted 5 years ago* (last edited 5 years ago) by 3dnudel@lemmy.ml to c/3dprinting@lemmy.ml


Hi there!

I think it'd be fun to discover each other design profiles. I'm using cults3d right now but Thingiverse, myMiniFactory and everything else are okay, too.

Sharing your social media accounts is totally cool, too, if they are 3D printing related.

2


I got a Prusa CORE One earlier this year, and so far I've been very happy. I have not ventured outside of the default settings though, and I use their own filament (only PLA). This has worked perfectly fine so far, but now I ran into an issue, and I figure it's time to come out of the "default settings"-bubble and learn some more about this stuff.

I am trying to print a Gridfinity holder for a rolling pin, so I tried to cut out a appropriately sized cylinder in a template with a boolean operator in Blender. When the print got to the concave portion, the print started to fail - uncertain how to best explain it, but the overhangs over the infill did not properly bridge and the filament started to warp so that the print head would hit it on the next pass (and make some nasty scratching sounds). I stopped the print when I noticed this. See an image here:

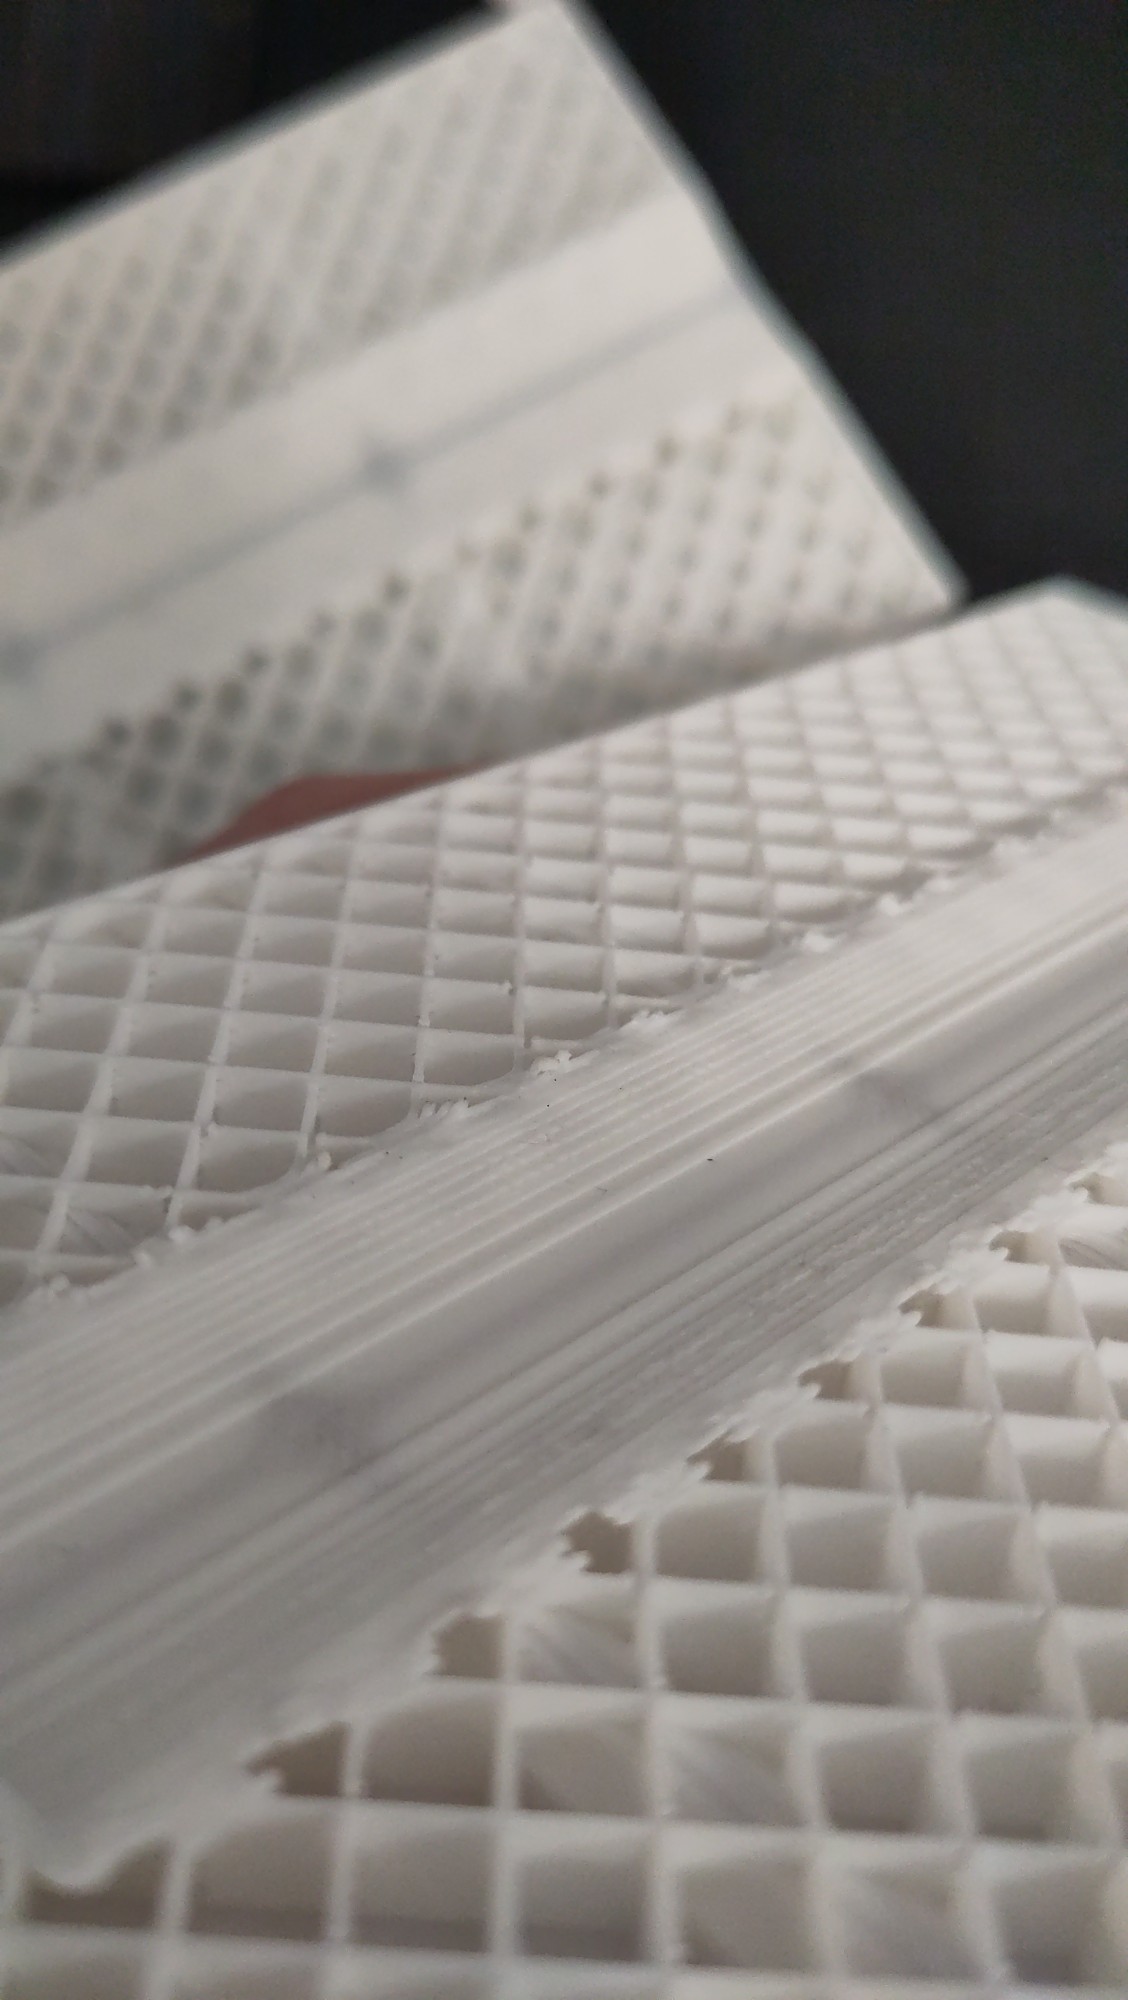
I am uncertain whether this is due to the model being poorly optimized for 3D-printing, if the printer settings for the filament were off or if I could've tweaked the slicing settings to achieve a better result.

Is it obvious, looking at the image, what the primary reason for this failure is?

Note: I've ended up printing this again already with a regular rectangular cutout instead of a cylindrical one, so I am just trying to learn more about what made this fail to learn more.

3


So I atm have a K1 and it just works. No issues printing wise.

I want to start to do multi color prints and was thinking of getting a Prusa Core One with MMU3.

The main reason is I like the slicer and Prusa doesn’t jam ads and coins down my throat whenever I print. I mainly upload my files to the cloud and send it to printer that way. Is this a good idea or should I just get crealitys multi color upgrade?

WWYD ?

4
5


Preface: I'm on my third cheap printer in the past ten years. I bought an Anycubic kobra neo a few years ago. I told myself I wouldn't mess with doing anything to it, but I was running into issues because of low quality control. I put it away due to frustration for the past year and now needed to print something and just figuring out all the issues. Right now I'm looking into upgrading the part cooling fan as I cannot get rid of stringing even on low temps with PLA. I should just buy a good printer but I just don't feel like I can justify it.

6


I recently got a Centauri Carbon and didn't find a community specifically for it on the Fediverse so I made one for anyone who is interested. https://lemmy.world/c/elegoo_centauri_carbon

7


Upgraded my Adept trackball to use the AnyBall 57-68mm mod, with an Aramith tournament series cue ball and Rexroth BTUs.

Sorry for constantly proselytizing about the wonders of PHA lol. But look at this thing! The Adept is pretty ingeniously designed for printing, but I wouldn't really say it's an easy print either. There are steeeeep overhangs and really long bridges. After getting the settings dialed in, PHA more or less handled it just fine, and now my trackball is home compostable. It also has this really interesting feel to it, kind of reminds me more of leather than plastic.

Few more pics:

8


Is anyone maintaining a centralized filament profile database for Voron and other FOSS printers like the Sovols? Understanding it would require filtering by hotend/extruder, etc, but seems like this would be something that exists somewhere.

9


Hello peoples, I have some acrylic panels that I have cut to size, and was thinking I could just print some edges / trim to make them nice and give a good finished look to them. Unfortunately my googlefu seems to be lacking and I cannot find what I am looking for. Can I get an assist in locating a or a few files. I dont doubt my abilities to make one if needed, but I have a few things going on and am looking for a simple solution. Thank you for you time!

UPDATE: What up nerds, I made my own. here's a link in case anyone wants some! https://www.printables.com/model/1355605-edge-trim-for-25mm-acrylic-panels

10


The design is based on the excellent Dactyl keyboard, generated with https://ryanis.cool/cosmos/ and it runs the excellent qmk firmware. It is handwired:

and I have also made a palm support using inkscape and openscad

All printed on a reprap prusa i3 derivative.

This helps me use my computer with less pain, so I want to call out all the wonderful projects and people who contribute to them which made it possible.

Total cost? $60 aud, amortised filament ~15 bucks worth maybe? and a lot of my time haha.

11


I am using an Ender 3 Pro v2, and I have followed multiple guides (they all say the same things) for setting up a print to prevent stringing. I’ve also switched between two filaments (Creality and Amolen) and the stringing doesn’t change at all. I have noticed that when heating up the horned, the filament just oozes out like ectoplasm even before the print starts.

I have never had this problem before, and could use some human advice.

I have upgraded/replaced the following parts in the past:

  1. Bowden Tubes
  2. Printer Nozzles
  3. Dual Gear Extruder
  4. Heater Block
  5. Heater Cartridge
  6. Thermistor Temp Sensor

My Tweaked Settings:

12


I have cut my teeth on the Ender 3 Pro v2 printer by Creality. Neat little printer; it works wonders when/if it’s perfectly dialed in. The thing is, I don’t have the interest to dial it in like it needs to be. I just want to turn it on, send it a print, and walk away. I do t want to spend all morning (like this morning) trying to “auto-level” 🙄 the bed, just to not have it be level.

When I try to manually level the bed it’s worse: I can measure one corner 5 times in a row, and get 5 wildly different heights each time. And I’m even using the Creality BL Touch sensor!

I have upgraded the springs, and I’m using the wide knob’s, and spent days trying to tune in my printer. I’m also using the Jyers Marlin firmware (15x15).

It’s exhausting and not fun. Help me Make Printing Fun Again. 😩

13


cross-posted from: https://lemmy.one/post/27366079

So I'm building a box turtle ams for my modded to all hell ender 3. My main idea was to create a filament cutter for the microswiss ng, but I cannot figure out a good way to do it with such a low filament travel path...which really sucks, as this is a very good hot end. Since I'm already doing this ams project, and have a wedding (very excited to marry my future wife) coming up, I really don't have the time for a second project. At this point I believe it will be easier to 3d print a voron hotend adapter to work with my ender 3, then to try and retrofit a filament cutter onto my ender 3 microswiss.

If you guys and gals know of anyone selling a completed one. Or have any ideas, please let me know!

14


Just a simple and (in my opinion) sleek phone stand. Link for anyone interested: printables.com/model/1251408-simple-static-phone-stand

15
16


As the title says, this is the best tolerance test I've been able to produce since I first started printing a few years ago. There's stringing, but that would be solved if I dried it, yes I dry pla too. This print is the Sci3d Clearance Test as downloaded in January 2023, from 0.5mm to 0.15mm clearances.

Every spinner is loose and easily moves, I actually had a bit of trouble with the center spindle due to a bit of over extrusion on the top layers.

My machine is a modified ender 3 pro with Klipper. Currently have a 0.4mm hardened steel nozzle mounted with 0.2mm layer heights.

Sliced with the latest release prusaslicer, custom printer, filament, and print profiles.

The filament is one of my favorite PLAs, Voxel PLA, this one is red, but they all print the same for me.

Sorry for the boring post, but this was a huge achievement for me and basically everyone I know wouldn't understand the magnitude of this kind of repeatable precision on such a low cost machine.

17


I've been printing quite a few registration plates to hold parts in place in production that need to sit as flat as possible on the production jigs.

I've noticed that taking the finished parts off the bed of the printer too soon causes them to warp: they come off the bed looking nicely set and straight, but as they finish cooling down unsupported, they slowly warp until they finally fully reach room temperature after 10 or 15 minutes.

So now I let them cool down slowly on the bed of the printer after the print is done. Ideally I let the bed cool down to room temperature: then the parts readily separate naturally as they shrink. If I'm in a hurry, I'll still wait until the parts release with very little force, around 35C - but no hotter than that, to avoid warping - as in this video.

18
19
20


Okay, this is an update of my first method using regular paper to splice filaments that I posted last week. It was okay, but it did require cleaning the splice because some paper stuck to it.

Somewhiteguy suggested in this comment that baking paper might yield better results. And boy! does it ever!

I've been thinking about trying this the entire week. Finally I got me a roll of the cheapest baking paper I could find at the supermarket while doing the groceries for the weekend and gave it a shot.

It is SO MUCH BETTER!

And here, just to prove it, I filmed myself doing a splice in real-time (sorry for the harsh light and the flickering, I filmed this under neon light in the lab).

Less than 3 minutes from start to finish if you ignore me fumbling with my cellphone to film this. No cleanup, perfect splice, and the roll of baking paper cost me a dollar and will last me a lifetime!

I genuinely thing this is the cleanest, cheapest, easiest splicing method that doesn't wastes bits of PTFE tubing at each splice.

21
22
23
24


cross-posted from: https://lemmy.world/post/24358989

Looks like Bambu is getting more enshittified. I am so glad I didn't let my recent frustration at my clumsiness with my Prusa steer me into Bambu-land.

25
1
submitted 9 months ago* (last edited 9 months ago) by ExtremeDullard@lemmy.sdf.org to c/3dprinting@lemmy.ml


Here's a method I've developed to splice filaments almost to perfection without any tools. It's basically the Teflon tube method for cheapskates who don't want to buy Teflon tubing 🙂

First of all, prepare a 2" x 2" (50mm x 50mm) -ish piece of white paper and a straighten a piece of filament that will serve as a mandrel:

Roll up the paper into a tube around the piece of straightened filament as tight as you can. The hard bit is to start rolling: the paper needs to be really snug against the filament to start with.

Once it's started right, it's easy. Roll it up all the way nice and flat. The bit of filament inside should fit inside the tube with quite a lot of friction if you did it right:

You can also wet it a few times with your tongue and it will stay in one piece without holding it. Ex-smoker's habits die hard 🙂

Cut the ends of the filaments to splice together with a sharp bevel:

Carefully thread the ends into the paper tube so they meet halfway:

They should go in with some force but they should slide smoothly. If you feel any roughness, you've snagged the paper inside and it won't work, so you should start over.

Heat up the center of the tube at 250C to 260C while ramming the filaments into each other firmly, but not so firmly as to collapse the paper tube, until you feel them "go" and melt into one another:

I use a SMD rework station because you can apply heat as much as you want and the paper only browns a bit, even if you overdo it grossly. It takes about 30 seconds for the heat to diffuse through the paper and for the filaments to melt fully. It's doable with a lighter too while pushing the filaments together with one hand, but it's less convenient of course.

Then unwrap the paper: some paper should stay stuck to the splice:

Clean up the splice by running a sharp knife along the splice all around. It's pretty quick, the paper isn't terminally fused to the filament:

Voila: perfect splice!

And here, seen under a microscope:

view more: next ›