Hackaday

777 readers
58 users here now

Fresh hacks every day

founded 10 months ago
MODERATORS
1


[It’s on my MIND] designed a clever BB blaster featuring a four-bar linkage that prints in a single piece and requires no additional hardware. The interesting part is how it turns a trigger pull into launching a 6 mm plastic BB. There is a spring, but it only acts as a trigger return and plays no part in launching the projectile. So how does it work?

There’s a spring in this BB launcher, but it’s not used like you might expect.

The usual way something like this functions is with the trigger pulling back a striker of some kind, and putting it under tension in the process (usually with the help of a spring) then releasing it. As the striker flies forward, it smacks into a BB and launches it. We’ve seen print-in-place shooters that work this way, but that is not what is happening here.

With [It’s on my MIND]’s BB launcher, the trigger is a four-bar linkage that transforms a rearward pull of the trigger into a forward push of the striker against a BB that is gravity fed from a hopper. The tension comes from the BB’s forward motion being arrested by a physical detente as the striker pushes from behind. Once that tension passes a threshold, the BB pops past the detente and goes flying. Thanks to the mechanical advantage of the four-bar linkage, the trigger finger doesn’t need to do much work. The spring? It’s just there to reset the trigger by pushing it forward again after firing.

It’s a clever design that doesn’t require any additional hardware, and even prints in a single piece. Watch it in action in the video, embedded just below.


From Blog – Hackaday via this RSS feed

2


The OrcaSlicer staggered perimeters in an FDM print, after slicing through the model. (Credit: CNC Kitchen)The OrcaSlicer staggered perimeters in an FDM print, after slicing through the model. (Credit: CNC Kitchen)

The idea of staggered (or brick) layers in FDM prints has become very popular the past few years, with now nightly builds of OrcaSlicer featuring the ‘Stagger Perimeters’ option to automate the process, as demonstrated by [Stefan] in a recent CNC Kitchen video. See the relevant OrcaSlicer GitHub thread for the exact details, and to obtain a build with this feature. After installing, slice the model as normal, after enabling this new parameter in the ‘Strength’ tab.

In the video, [Stefan] first tries out a regular and staggered perimeter print without further adjustments. This perhaps surprisingly results in the staggered version breaking before the regular print, which [Stefan] deduces to be the result of increasing voids within the print. After increasing the extrusion rate (to 110%) to fill up said voids, this does indeed result in the staggered part showing a massive boost in strength.

What’s perhaps more telling is that a similar positive effect is observed when the flow is increased with the non-staggered part, albeit with the staggered part still showing more of a strength increase. This makes it obvious that just staggering layers isn’t enough, but that the flowrate and possibly other parameters have to be adjusted as well to fully realize the potential of brick layers. That said, it’s encouraging to see this moving forward despite questionable patent claims.


From Blog – Hackaday via this RSS feed

3


If you need to weigh your pet, you’ll soon find that getting an animal to stand on a weighing machine to order is very difficult indeed. If the critter in question is a cat or a small dog you can weigh yourself both holding them and not holding them, and compute the difference. But in the case of a full size Bernese mountain dog, the hound is simply too big for that. Lateral thinking is required, and that’s how [Saren Tasciyan] came up with the idea of making a dog bed that’s also a weighing machine. When the mutt settles down, the weight can be read with ease. The bed itself is a relatively straightforward wooden frame, with load cells placed above rubber feet. The load cells in turn talk to an ESP8266 which has an LCD display to deliver the verdict. Dog weighed, without the drama.

This project is of course part of the Hackaday 2025 Pet Hacks contest, an arena in which any of the cool hacks you’ve made to enhance you and your pet’s life together can have an airing. Meanwhile this isn’t the first time this particular pooch has had a starring role; he’s sported a rather fetching barrel in a previous post.

2025 Hackaday Pet Hacks Contest


From Blog – Hackaday via this RSS feed

4


The Radio Shack TRS-80 was a much-loved machine across America. However, one thing it lacked was MIDI. That’s not so strange given the era it was released in, of course. Nevertheless, [Michael Wessel] has seen fit to correct this by creating the MIDI/80—a soundcard and MIDI interface for this old-school beast.

The core of the build is a BluePill STM32F103C8T6 microcontroller, running at a mighty 75 MHz. Plugged into the TRS-80s expansion port, the microcontroller is responsible for talking to the computer and translating incoming and outgoing MIDI signals as needed. Naturally, you can equip it with full-size classic DIN sockets for MIDI IN and MIDI OUT using an Adafruit breakout module. None of that MIDI Thru nonsense, though, that just makes people uncomfortable. The card is fully capable of reproducing General MIDI sounds, too, either via plugging in a Waveblaster sound module to the relevant header, or by hooking up a Roland Sound Canvas or similar to the MIDI/80s MIDI Out socket. Software-wise, there’s already a whole MIDI ecosystem developing around this new hardware. There’s a TRS-80 drum tracker and a synthesizer program, all with demo songs included. Compatibility wise, The MIDI/80 works with the TRS-80 Model I, III, and 4.

Does this mean the TRS-80 will become a new darling of the tracker and chiptune communities? We can only hope so! Meanwhile, if you want more background on this famous machine, we’ve looked into that, too. Video after the break.


From Blog – Hackaday via this RSS feed

5


Hackaday Links Column Banner

It appears that we’re approaching the HAL-9000 point on the AI hype curve with this report, which suggests that Anthropic’s new AI model is willing to exhibit some rather antisocial behavior to achieve its goals. According to a pre-release testing summary, Claude Opus 4 was fed some hypothetical company emails that suggested engineers were planning to replace the LLM with another product. This raised Claude’s hackles enough that the model mined the email stream for juicy personal details with which to blackmail the engineers, in an attempt to win a stay of execution. True, the salacious details of an extramarital affair were deliberately seeded into the email stream, and in most cases, it tried less extreme means to stay alive, such as cajoling senior leaders by email, but in at least 84% of the test runs, Claude eventually turned to blackmail to get its way. So we’ve got that to look forward to.

Also from the world of AI, at least tangentially, it now appears possible to doxx yourself just by making comments on YouTube videos. The open-source intelligence app is called YouTube Tools, and when provided with a user’s handle, it will develop a profile of the user based on their comments and some AI magic. We wanted to give it a try, but alas, it requires a paid subscription to use, and we’re not willing to go that far even for you, dear reader. But reports are that it can infer things like the general region in which the commenter lives and discern their cultural and social leanings. The author, LolArchiver, has a range of similar mining tools for other platforms along with reverse-lookup tools for phone and email addresses, all of which likely violate the terms of service in all kinds of ways. The accuracy of the profile is obviously going to depend greatly on how much material it has to work with, so in addition to the plenty of reasons there are to avoid reading YouTube comments, now there’s a solid reason to avoid writing them.

“Danger! Code Yellow aboard the International Space Station! All hands to emergency escape pods!” OK, maybe not, but as we teased a bit on this week’s podcast, there’s now a handy desktop app that allows you to keep track of the current level of urine in the ISS’s storage tanks. The delightfully named pISSStream, which is available only for the Apple ecosystem, taps into NASA’s telemetry stream (lol) and pulls out the current level in the tanks, because why the hell not? As unserious as the project is, it did raise an interesting discussion about how fluid levels are measured in space. So we’ll be diving into that topic (yuck) for an article soon. It’ll be our number one priority.

Looks like it’s time for another Pluto pity-party with the news of a new trans-Neptunian object that might just qualify as another dwarf planet for our solar system. Bloodlessly named 2017 OF201, the object has an extremely elongated orbit, reaching from just outside Pluto’s orbit at about 44 astronomical units at perihelion and stretching more than 1,600 AUs at aphelion, and takes 25,000 years to complete. It honestly looks more like the orbit of a comet, but with an estimated diameter of 700 km, it may join the nine other likely dwarf planets, if further observations reveal that it’s properly rounded. So not only has Pluto been demoted from legit planet, it’s now just one of potentially ten or more dwarf planets plugging around out in the deep dark. Poor Pluto.

And finally, we hope this one is a gag, but we fear that the story of a Redditor unaware that analog camera film needs to be developed rings alarmingly true. The mercifully unnamed noob recently acquired a Canon AE-1 — excellent choice; that was our first “real” camera back in the day — and ran a couple of rolls of Kodak ColorPlus 200 through it. All seemed to be going well, although we suspect the photographer reflexively pulled the camera away from their eye with each exposure to check the non-existent screen on the back of the camera; old habits die hard. But when one roll of the exposed film was fed through a 35-mm scanner, the Redditor was disappointed to see nothing. Someone offered the suggestion that developing the film might be a good idea, hopefully as gently as possible. Hats off for dipping a toe in the analog world, but the follow-through is just as important as the swing.


From Blog – Hackaday via this RSS feed

6


[3DSage] likes building replicas of hardware from movies and video games, often with a functional twist. His latest build aimed to bring the Codec from Metal Gear Solid to life.

If you haven’t played the Metal Gear games, the Codec has been modelled somewhat like an advanced walkie talkie at times, but has often been kept off-screen. Thus, [3DSage] had a great deal of creative latitude to create a realistic-feeling Codec device that provided voice communications and some simple imagery display.

The resulting build relies on an RP2040 microcontroller to run the show. It’s paired with an MPU6050 3-axis gyroscope and accelerometer for motion control of the device’s functionality, and features a small LCD screen to mimic the display in the games. A kids walkie-talkie kit was leveraged for audio communication, but kitted out with a better microphone than standard. Power is via a rechargeable 9V battery, which is really a lithium-ion and USB charging board packed into the familiar 9V form factor.

Where the build really shines, though, is the aesthetic. [3DSage] managed to capture the military-like look and feel as well as authentically recreate the graphics from the games on the screen. The simulated noise on the display is particularly charming. Beyond that, the 3D-printed enclosures leverage texture and multi-color printing really well to nail the fit and finish.

Ultimately, the Codec isn’t much more than a glorified walkie talkie. Even still, [3DSage] was able to create an impressive prop that actually does most of what the device can do in game. If you’ve ever coveted a PipBoy or tricorder, this is one project you’ll be able to appreciate.


From Blog – Hackaday via this RSS feed

7


It’s always nice to see new developments in the world of electronic badges, and while there are events and badge teams pushing the technological envelope there’s still plenty of scope for innovation without too many exotic parts. This year’s DORS/CLUC open source conference in Croatia has just such a badge, with a large alphanumeric LED display as well as USB and an NFC reader. During the conference it displayed the user’s name and could be used in an NFC-based game, but it’s also designed to be used as a general purpose notification device afterwards.

The write-up is familiar to anyone who has been involved with badge production, a tale of long soldering sessions as missing components had to be added later, and of last minute firmware flashing. The heart of the machine is an STM32L073, with an IS31FL3731 LED matrix driver chip and an ST25R3916 for the NFC. All the files can be found in a GitLab repo, and there’s a video below the break showing it all in action.


From Blog – Hackaday via this RSS feed

8


It’s sometimes easy to forget that the light in the sky is an actual star. With how reliable it is and how busy we tend to be as humans, we can take that incredible fact and stow it away and largely go on with our lives unaffected. But our star is the thing that gives everything on the planet life and energy and is important to understand. Humans don’t have a full understanding of it either; there are several unsolved mysteries in physics which revolve around the sun, the most famous of which is the coronal heating problem. To help further our understanding a number of scientific instruments have been devised to probe deeper into it, and this adaptive optics system just captures some of the most impressive images of it yet.

Adaptive optics systems are installed in terrestrial telescopes to help mitigate the distortion of incoming light caused by Earth’s atmosphere. They generally involve using a reference source to measure these distortions, and then make changes to the way the telescope gathers light, in this case by making rapid, slight changes to the telescope’s mirror. This system has been installed on the Goode Solar Telescope in California and has allowed scientists to view various solar phenomena with unprecedented clarity.

The adaptive optics system here has allowed researchers to improve the resolution from the 1000 km resolution of other solar telescopes down to nearly the theoretical limit of this telescope—63 km. With this kind of resolution the researchers hope that this clarity will help shine some light on some of the sun’s ongoing mysteries. Adaptive optics systems like this aren’t just used on terrestrial telescopes, either. This demonstration shows how the adaptive optics system works on the James Webb Space Telescope.

Thanks to [iliis] for the tip!


From Blog – Hackaday via this RSS feed

9


Since the tail end of World War II, humanity has struggled to deal with its newfound ability to harness the tremendous energy in the nucleus of the atom. Of course there have been some positive developments like nuclear power which can produce tremendous amounts of electricity without the greenhouse gas emissions of fossil fuels. But largely humanity decided to build a tremendous nuclear weapons arsenal instead, which has not only cause general consternation worldwide but caused specific problems for one scientist in particular.

[Steve Weintz] takes us through the tale of [Dr. John C. Clark] who was working with the Atomic Energy Commission in the United States and found himself first at a misfire of a nuclear weapons test in the early 1950s. As the person in charge of the explosive device, it was his responsibility to safely disarm the weapon after it failed to detonate. He would find himself again in this position a year later when a second nuclear device sat on the test pad after the command to detonate it was given. Armed with only a hacksaw and some test equipment he was eventually able to disarm both devices safely.

One note for how treacherous this work actually was, outside of the obvious: although there were safety devices on the bombs to ensure the nuclear explosion would only occur under specific situations, there were also high explosives on the bomb that might have exploded even without triggering the nuclear explosion following it. Nuclear bombs and nuclear power plants aren’t the only things that the atomic age ushered in, though. There have been some other unique developments as well, like the nuclear gardens of the mid 1900s.


From Blog – Hackaday via this RSS feed

10


Portal 2is mostly known as the successful sequel to Valve’s weird physics platformer, Portal. It’s not really known for being a webserver. That might change, though, given the hard work of [PortalRunner].

Quite literally, [PortalRunner] hacked the Source engine and Portal 2 to actually run a working HTTP web server. That required setting up the code to implement a TCP network socket that was suitable for web traffic, since the engine primarily functions with UDP sockets for multiplayer use. This was achieved with a feature initially put in the Source engine for server management in the Left 4 Dead games. From there, the game engine just had to be set up to reply to HTTP requests on that socket with the proper responses a visiting browser expects. If the game engine responds to a browser’s connection request with a bunch of HTML, that’s what the browser will display. Bam! You’ve got a web server running in Portal 2.

From there, [PortalRunner] went further, setting things up so that the status of in-game objects effects the HTML served up to visiting web browsers. Move objects in the game, and the served web page changes. It’s pretty fun, and the complexity and features [PortalRunner] implements only get more advanced from there. When he gets into stacking companion cubes to write HTML in visual form, you’ll want to applaud the Minecraftian glory of it all.

The devil is really in the details on this one, and it’s a great watch. In reality, making Portal 2 into a simple web server is far easier than you might have thought possible. Valve’s physics masterpiece really is popular with hackers; we see it popping up around here all the time. Video after the break.


From Blog – Hackaday via this RSS feed

11


Circuit diagram of linear-feedback shift register.

Today we heard from [Richard James Howe] about his new CPU. This new 16-bit CPU is implemented in VHDL for an FPGA.

The really cool thing about this CPU is that it eschews the typical program counter (PC) and replaces it with a linear-feedback shift register (LFSR). Apparently an LFSR can be implemented in hardware with fewer transistors than are required by an adder.

Usually the program counter in your CPU increments by one, each time indicating the location of the next instruction to fetch and execute. When you replace your program counter with an LFSR it still does the same thing, indicating the next instruction to fetch and execute, but now those instructions are scattered pseudo-randomly throughout your address space!

When the instructions for your program are distributed pseudo-randomly throughout your address space you find yourself in need of a special compiler which can arrange for this to work, and that’s what this is for. Of course all of this is shenanigans and is just for fun. This isn’t the first time we’ve heard from [Richard], we have seen his Bit-Serial CPU and Forth System-On-Chip in recent history. Glad to see he’s still at it!

Thanks to [Richard James Howe] for letting us know about this latest development.


From Blog – Hackaday via this RSS feed

12


What do you get when you combine an ESP32, a 16-bit DAC, an antique VFD, and an IDE CD-ROM drive? Not much, unless you put in the work, which [Akasaka Ryuunosuke] did to create ESPer-CDP, a modern addition for your hi-fi rack.

It plays CDs (of course), but also can also scrobb the disks to Last.fm, automatically fetch track names and lyrics for CDs, and of course stream internet radio. It even acts as a Bluetooth speaker, because when you have an ESP32 and a DAC, why not? Of course we cannot help but award extra style points for the use of a VFD, a salvaged Futaba GP1232A02.  There’s just something about VFDs and stereo equipment that makes them go together like milk and cookies.

close up of front of machine showing VFD.Between the panel and the VFD, this could almost pass as vintage Sony.

In terms of CD access, it looks like the IDE interface is being used to issue ATAPI commands to the CD-ROM drive to get audio out via S/PDIF.  (Do you remember when you had to hook your CD drive to your sound card to play music CDs?) This goes through a now-discontinued WM8805 receiver — a sign this project has been in the works for a while — that translates S/PDIF into an I2S stream the ESP32 can easily work with.

Work with it it does, with the aforementioned scrobbing, along with track ID and time-sinked lyrics via CDDB or  MusicBrainz. The ESP32 should have the computing power to pull data through the IDE bus and decode it, but we have to admit that this hack gets the job done — albeit at the expense of losing the ability to read data CDs, like MP3 or MIDI. [Akasaka Ryuunosuk] has plans to include such functionality into v2, along with the ability to use a more modern SATA CD-ROM drive. We look forward to seeing it, especially if it keeps the VFD and classic styling. It just needs to be paired with a classic amplifier, and maybe a DIY turntable to top off the stack.

Thanks to [Akasaka Ryuunosuke] for the tip. If you also crave our eternal gratitude (which is worth its weight in gold, don’t forget), drop us a tip of your own. We’d love to hear from you.


From Blog – Hackaday via this RSS feed

13


Rusty bathtub outdoors on equally rusty car springs

In a fusion of scrapyard elegance and Aussie ingenuity, [Mark Makies] has given a piece of old steel a steamy second life with his ‘CastAway Tub’. Call it a bush mechanic’s fever dream turned functional sculpture, starring two vintage LandCruiser leaf springs, and a rust-hugged cast iron tub dug up after 20 years in hiding. And put your welding goggles on, because this one is equal parts brute force and artisan flair.

What makes this hack so bold is, first of all, the reuse of unforgiving spring steel. Leaf springs, notoriously temperamental to weld, are tamed here with oxy-LPG preheating, avoiding thermal shock like a pro. The tub sits proudly atop a custom-welded frame shaped from dismantled spring packs, with each leaf ground, clamped, torched, and welded into a steampunk sled base. The whole thing looks like it might outrun a dune buggy – and possibly bathe you while it’s at it. It’s a masterclass in metalwork with zero CAD, all intuition, and a grinder that’s seen things.

Inspired? For those with a secret love for hot water and hot steel, this build is a blueprint for turning bush junk into backyard art. Read up on the full build at Instructables.


From Blog – Hackaday via this RSS feed

14


Mark Setrakian and Adam Savage investigate a massive prop hand

The AI effects we know these days were once preceded by CGI, and those were once preceded by true hand-built physical props. If that makes you think of Muppets, this video will change your mind. In a behind-the-scenes look with [Adam Savage], effects designer [Mark Setrakian] reveals the full animatronic glory of Mr. Wink’s mechanical fist from Hellboy II: The Golden Army (2008) – and this beast still flexes.

Most of this arm was actually made in 2003, when 3D printing was very different than what we think of today. Printed on a Stratasys Titan – think: large refrigerator-sized machine, expensive as sin – the parts were then hand-textured with a Dremel for that war-scarred, brutalist feel. This wasn’t just basic animatronics for set dressing. This was a fully actuated prop with servo-driven finger joints, a retractable chain weapon, and bevel-geared mechanisms that scream mechanical craftsmanship.

Each finger is individually designed. The chain reel: powered by a DeWalt drill motor and custom bevel gear assembly. Every department: sculptors, CAD modelers, machinists, contributed to this hybrid of analog and digital magic. Props like this are becoming unicorns.


From Blog – Hackaday via this RSS feed

15


A weather forecast is shown on a blue monochrome cathode ray tube display. It is displaying current conditions, and displays a “The Weather Channel” graphic in the top left corner.

It would be hard to find any electronics still in production which use CRT displays, but for some inscrutable reason it’s easy to find cheap 4-inch CRTs on AliExpress. Not that we’re complaining, of course. Especially when they get picked up for projects like this Retro CRT Weather Display from [Conrad Farnsworth], which recreates the interface of The Weather Channel’s WeatherStar 4000+ in a suitably 90s-styled format.The CRT itself takes up most of the space in the enclosure, with the control electronics situated in the base behind the display driver. A Raspberry Pi Zero W provides the necessary processing power, and connects to the CRT through its composite video output.

A custom PCB plugs into the GPIO header on the Raspberry Pi and provides some additional features, such as a rotary encoder for volume and brightness display, a control button, a serial UART interface, and a speaker driver. The design still has one or two caveats: it’s designed to powered by USB, but [Conrad] notes that it draws more current than USB 2.0 can provide, though USB-C should be able to keep up.On the software side, a Python program displays a cycle of three slides: local weather, regional weather, and a radar display. For the local and regional weather display graphics, [Conrad] created a static background image containing most of the graphics, and the program only generated the dynamic components. For the radar display, the regional map’s outlines come from Natural Earth, and a Python program overlays radar data on them.

We’ve seen other attempts at recreating the unique style of the WeatherStar system, but nothing quite beats the real thing.


From Blog – Hackaday via this RSS feed

16


Motorized faders are very cool, and you can find them in everything from expensive mixing desks to high-end video editing decks. If you want to build your own wireless motorized fader controls for your own projects, you might like this project from [Ian Peterson].

Faders are useful controls, but they’re usually very one-way devices—you set them to what you want, and that’s it. However, motorized faders are a little fancier. You can move them yourself, or they can be moved under the command of other hardware or software—making a control change automatically that is still visible to the human in front of the control panel.

[Ian Peterson] built his OSCillator motorized fader for his work with lighting consoles in theater contexts. Its name references the Open Sound Control (OSC) platform which is commonly used across various lighting consoles. His build relies on an ESP32 to run the show, which communicates with other lighting hardware via WiFi. The microcontroller is responsible for reading the position of the fader and built-in button, and sending the relevant commands to other lighting devices on the network. At the same time, it must also listen to commands from lighting consoles on the network and update the motorized fader’s position in turn if the relevant control it’s mapped to has been changed elsewhere.

If you’re working in theater or film and you’re wanting to control lighting cues wirelessly, a tool like this can really come in handy. We don’t see a lot of motorized faders in DIY projects, but they pop up now and then.


From Blog – Hackaday via this RSS feed

17


A treadmill-style bed can be a great addition to a 3D printer. It allows prints to be shifted out of the build volume as printing continues, greatly increasing the size and flexibility of what you can print. But [Ivan Miranda] and [Jón Schone] had a question. Instead of making a treadmill to suit a 3D printer, what if you just built a 3D printer on top of a full-size treadmill?

The duo sourced a piece of real gym equipment for this build. They then set about building a large-scale 3D printer on top of this platform. The linear rails were first mounted on to the treadmill’s frame, followed by a gantry for the print head itself and mounts for the necessary stepper motors. The printer also gained a custom extra-large extruder to ensure a satisfactory print speed that was suitable for the scale of the machine. From there, it was largely a case of fitting modules and running cables to complete the printer.

Soon enough, the machine was printing hot plastic on the treadmill surface, thereby greatly expanding the usable print volume. It’s a little tricky to wrap your head around at first, but when you see it in action, it’s easy to see the utility of a build like this, particularly at large scale. [Ivan] demonstrated this by printing a massive girder over two meters long.

We started seeing attempts at building a belt-equipped “infinite build volume” printer back in 2017, and it took awhile before the concept matured enough to be practical. Even today, they remain fairly uncommon.


From Blog – Hackaday via this RSS feed

18


In a marvelous college lecture in front of a class of engineering students, V. Hunter Adams professed his love for embedded engineering, but he might as well have been singing the songs of our people – the hackers. If you occasionally feel the need to explain to people why you do what you do, at fancy cocktail parties or something, this talk is great food for thought. It’s about as good a “Why We Hack” as I’ve ever seen.

Among the zingers, “projects are filter removers” stuck out. When you go through life, there are a lot of things that you kinda understand. Or maybe you’ve not even gotten around to thinking about whether you understand them or not, and just take them for granted. Life would all simply be too complicated if you took it all sufficiently seriously. Birdsong, Bluetooth, the sun in the sky, the friction of your car’s tire on various surfaces. These are all incredibly deep subjects, when you start to peel back the layers.

And Hunter’s point is that if you are working on a project that involves USB, your success or failure depends on understanding USB. There’s no room for filters here – the illusion that it “just works” often comes crashing down until you learn enough to make it work. Some of his students are doing projects cooperatively with the ornithology department, classifying and creating birdsong. Did you know that birds do this elaborate frequency modulation thing when they sing? Once you hear it, you know, and you hear it ever more.

So we agree with Hunter. Dive into a project because you want to get the project done, sure, but pick the project because it’s a corner of the world that you’d like to shine light into, to remove the filters of “I think I basically understand that”. When you get it working, you’ll know that you really do. Hacking your way to enlightenment? We’ve heard crazier things.

This article is part of the Hackaday.com newsletter, delivered every seven days for each of the last 200+ weeks. It also includes our favorite articles from the last seven days that you can see on the web version of the newsletter. Want this type of article to hit your inbox every Friday morning? You should sign up!


From Blog – Hackaday via this RSS feed

19


White LED bulbs are commonplace in households by now, mostly due to their low power usage and high reliability. Crank up the light output enough and you do however get high temperatures and corresponding interesting failure modes. An example is the one demonstrated by the [electronupdate] channel on YouTube with a Philips MR16 LED spot that had developed a distinct purple light output.

The crumbling phosphor coating on top of the now exposed UV LEDs. (Credit: electronupdate, YouTube)The crumbling phosphor coating on top of the now exposed UV LEDs. (Credit: electronupdate, YouTube)

After popping off the front to expose the PCB with the LED packages, the fault seemed to be due to the phosphor on one of the four LEDs flaking off, exposing the individual UV LEDs underneath. Generally, white LEDs are just UV LEDs that have a phosphor coating on top that converts this UV into broad band visible (white) or a specific wavelength, so this failure mode makes perfect sense.

After putting the PCB under a microscope and having a look at the failed and the other LED packages the crumbled phosphor on not just the one package became obvious, as the remaining three showed clear cracks in the phosphor coating. Whether due to the heat in these high-intensity spot lamps or just age, clearly over time these white LED packages become just UV LEDs. Ideally you could dab on some fresh phosphor, but likely the fix is to replace these LED packages every few years until the power supply in the bulb gives up the ghost.

Thanks to [ludek111] for the tip.


From Blog – Hackaday via this RSS feed

20


At the end of the day, a skateboard boils down to a plank of wood with some wheels. They are wonderfully simple and fun and cheap modes of transportation. But this is Hackaday, so we are not here to talk about any normal skateboard, but one you can download and print. [megalog_’s] Skateboard MK2 is made almost entirely of 3D printed plastic, save some nuts and bolts.

The board’s four piece deck comes in at a modest 55cm length and features a rather stylish hexagonal pattern for grip. While you could presumably bring your own trucks, 3D printable ones are provided as well. The pieces bolt together to create a fairly strong deck with the option to make a rather stylish two tone print if you have the printer for it. Where the pieces meet is also the location of the truck mounting, further increasing the board’s strength. The weakest point is where the tail meets the main deck, which if pressed down to wheelie or ollie, the print breaks apart at the layer lines.

While you might be able to bring your own trucks, all be it with some modification to the deck, [megalog] also provided models for those as well. Not only were the bushings made of flexible TPE filament, but the outer wheel tire is too. It’s a little strange to see a wheel tire combo on a skateboard, when they are traditionally over moulded plastic with enough tire that you would be forgiven for thinking there is no wheel. While some reported using the more traditional threaded rod, the trucks used a metal rod with shaft collars to attach the wheels.

This is a neatly executed skateboard build with a well thought out design. Let us know in the comments if you will (or have) made one yourself! While you’re at it, maybe cast your own resin wheels for it!


From Blog – Hackaday via this RSS feed

21


If you look at this solar generator from [Concept Crafted Creations], you might think it’s somehow familiar. That’s because the design was visually inspired by the James Webb Space Telescope, or JWST. Ultimately, though, it’s purpose is quite different—it’s designed to use mirrors to collect and harness solar energy. It’s not quite there yet, but it’s an interesting exploration of an eye-catching solar thermal generator.

To get that JWST look, the build has 18 mirrors assembled on a 3D printed frame to approximate the shape of a larger parabolic reflector. The mirrors focus all the sunlight such that it winds up heating water passing through an aluminum plate. Each mirror was custom made using laser cut acrylic and mirror film. Each mirror’s position and angle can be adjusted delicately with screws and a nifty sprung setup, which is a whole lot simpler than the mechanism used on the real thing. The whole assembly is on a mount that allows it to track the movement of the sun to gain the most sunlight possible. There’s a giant laser-cut wooden gear on the bottom that allows rotation on a big Lazy Susan bearing, as well as a servo-driven tilting mechanism, with an Arduino using light dependent resistors to optimally aim the device.

It’s a cool-looking set up, but how does it compare with photovoltaics? Not so well. The mirror array was able to deliver around 1 kilowatt of heat into the water passing through the system, heating it to a temperature of approximately 44 C after half an hour. The water was warmed, but not to the point of boiling, and there’s no turbines or anything else hooked up to actually take that heat and turn it into electricity yet. Even if there were, it’s unlikely the system would reach the efficiency of a similarly-sized solar panel array. In any case, so far, the job is half done. As explained in the build video, it could benefit from some better mirrors and some structural improvements to help it survive the elements before it’s ready to make any real juice.

Ultimately, if you need solar power fast, your best bet is to buy a photovoltaic array. Still, solar thermal is a concept that has never quite died out.


From Blog – Hackaday via this RSS feed

22


When it comes to LED matrixes, building one is just the first step. Then you have to decide what to display on it. [panjanek] came up with a relatively flexible answer to this question, building an RGB LED matrix that can display the GIFs of your choice.

The web interface accepts GIFs for display.

[panjanek] grabbed WS2812B addressable LEDs for this project, assembling them into a 32 x 32 matrix that fits perfectly inside an off-the-shelf Ikea picture frame. The matrix is hooked up to an ESP8266 microcontroller, which acts as the brains of the operation. The WiFi-enabled microcontroller hosts its own web interface, with which the project can be controlled. Upon opening the page, it’s possible to upload a GIF file that will be displayed as an animation on the matrix itself. It’s also possible to stream UDP packets of bitmap data to the device to send real-time animations over a network.

It’s a neat build, and one that answers any questions of what you might display on your LED matrix when you’re finished assembling it. Code is on Github if you fancy implementing the GIF features in your own work. We’ve featured some unexpected LED matrix builds of late, like this innovative device for the M.2 slot. Meanwhile, if you’re cooking up your own creative LED builds, don’t hesitate to let us know on the tipsline!


From Blog – Hackaday via this RSS feed

23


If you’ve been following environmental news over the past couple of decades, you’ve probably heard about PFAS – those pesky “forever chemicals” that seem to turn up everywhere from drinking water to polar bear blood. They’re bad for us, and we know it, but they’ve been leeching into the environment for decades, often as a result of military or industrial activity. What’s worse is that these contaminants just don’t seem to break down—they stick around in the environment causing harm on an ongoing basis.

Now, researchers are finally cracking the code on how to deal with these notoriously stubborn molecules. It won’t be easy, but there’s finally some hope in the fight against the bad stuff that doesn’t just wash away.

Do You Really Want To Live Forever?

PFAS chemicals have been found contaminating tapwater supplies across the United States, and the world. Credit: USGS, public domain

The term “forever chemicals” is media shorthand for perfluoroalkyl and polyfluoroalkyl substances—or PFAS for short. These substances earned their nickname from The Washington Post in 2018, and for good reason. These synthetic compounds feature carbon-fluorine bonds. These are some of the strongest chemical bonds found in nature and are very hard to break. This molecular stubbornness is actually a key feature of these chemicals, making them incredibly useful for things like firefighting foams or non-stick cookware—indeed, the remarkably unreactive Teflon was one of the first PFAS materials to come to prominence. However, this very feature  also means they accumulate in the environment and in our bodies rather than breaking down naturally.

In practical terms, the strength of the carbon-fluorine bond means that PFAS chemicals are remarkably stable, and can easily resist high temperatures and chemical attack. Thus, they can persist in the environment for thousands of years, contaminating water supplies, accumulating in food chains, and most crucially—causing health issues. Research is ongoing, but PFAS chemicals have already been implicated in potentially causing everything from cancers to hormone disruption and liver damage.

Stop The Spread

Firefighting foams are one of the prime sources of PFAS contamination. The problem is often at its worst in areas where these foams are used regularly, such as military airfields. Credit: Brandweer Neder-Betuwe, kazerne Ochten, Nederland, CC BY-SA 3.0

Obviously, it’s not desirable to have toxic chemicals building up in the environment. Cleaning up existing contamination is of prime importance, particularly in areas where humans still live and work. Removing these chemicals in drinking water supplies remains challenging, but possible. The techniques are well understood, typically requiring the use of reverse osmosis techniques or lots of activated carbon. But what about all the contaminated human-built infrastructure, like military airfields and the like? Many of these concrete and tarmac structures have been soaking in PFAS chemicals for decades, and pose a continued risk of these substnaces leaking into the environment.

Australian firm AmbioLock has gone with an unconventional approach. Rather than trying to remove PFAS from contaminated concrete at airports and fire training grounds, they’ve developed a sealant to lock the chemicals in place. The idea is that the dangerous chemicals can be sealed to the engineered materials so they don’t leach into the environment or harm anyone using the infrastructure on the regular. The company has developed a silicate-based sealant called AmbioSeal, which penetrates the pores of concrete structures to create an impermeable barrier. In testing, the sealant achieved a 99.2% reduction in PFAS leaching from treated materials. The idea is that built infrastructure can be treated to seal PFAS contamination in place, such that the facilities can still be used safely while minimizing further risk from these deletrious chemicals.

The products could yet find grand markets with governments and private operators around the world. There are a great many PFAS contamination sites that are badly in need of remediation. However, it’s still an imperfect measure—ideally, we wouldn’t be spraying these nasty chemicals all over the place to begin with.

Ultimate Destruction

Government and industry are also keen to find ways to limit or avoid future potential releases, too. Enter a team of researchers from CSIRO and Colorado State University. Using computer simulations rooted in quantum mechanics, they modeled exactly what happens to PFAS molecules during pyrometallurgy. The scenario in question concerned lithium-ion battery recycling via pyrometallurgy—the process of incinerating battery materials to recover the metals inside. The researchers eager to determine what peak incinerator temperatures were necessary to destroy any PFAS component of the recyclable battery material, thus ensuring that it would not be released into the environment during the recycling procedure.

There is an increasing push to begin mass battery recycling of lithium-ion cells. Researchers at Colorado State and CSIRO have been working to determine how best to pursue that goal while avoiding the release of harmful PFAS chemicals into the atmosphere. Credit: Doğru akım enerji, CC BY-SA 4.0

Their findings revealed a critical temperature threshold. At lower temperatures (200 °C to 500 °C), PFAS compounds simply vaporize and enter the gas phase, becoming mobile but otherwise remaining stable. The team found that higher temperatures were needed to get the tough C-F bonds to finally surrender and break apart completely. Modelling for an incinerator’s short two-second retention time for gases, the team determined a temperature of 950 °C was necessary to attain quick destruction. “We identified the intermediate compounds formed, the key barriers in the process, and determined the required temperatures and times to fully break down these chemicals,” noted Dr Jens Blotevogel, a CSIRO researcher involved with the project.

While the research focused on a specific recycling case, it has broader implications. The modelling may guide future work for other scenarios where it’s desirable to create a recycling process or similar in which PFAS materials will be destroyed rather than emitted to the environment. There is a particularly strong focus on how the world will recycle the masses of batteries now floating around the economy, so it will have direct benefits in limiting PFAS emissions in that regard, too.

These breakthroughs represent real progress, but the challenge now is implementation. Governments, industries, and relevant authorities will need to invest in research and techniques like these to develop cost-effective solutions for the thousands of PFAS-emitting and PFAS-contaminated sites worldwide. PFAS destruction represents one of the major mainstream environmental challenges today. As these researchers have shown, with the right analysis and some clever chemistry, “forever” doesn’t necessarily have to mean forever.


From Blog – Hackaday via this RSS feed

24


3D Filament lizards show decomposable joints

What if you could design your 3D print to fall apart on purpose? That’s the curious promise of a new paper from CHI 2025, which brings a serious hacker vibe to the sustainability problem of multi-material 3D printing. Titled Enabling Recycling of Multi-Material 3D Printed Objects through Computational Design and Disassembly by Dissolution, it proposes a technique that lets complex prints disassemble themselves via water-soluble seams. Just a bit of H2O is needed, no drills or pliers.

At its core, this method builds dissolvable interfaces between materials like PLA and TPU using water-soluble PVA. Their algorithm auto-generates jointed seams (think shrink-wrap meets mushroom pegs) that don’t interfere with the part’s function. Once printed, the object behaves like any ordinary 3D creation. But at end-of-life, a water bath breaks it down into clean, separable materials, ready for recycling. That gives 90% material recovery, and over 50% reduction in carbon emissions.

This is the research – call it a very, very well documented hack – we need more of. It’s climate-conscious and machine-savvy. If you’re into computational fabrication or environmental tinkering, it’s worth your time. Hats off to [Wen, Bae, and Rivera] for turning what might otherwise be considered a failure into a feature.


From Blog – Hackaday via this RSS feed

25


Until the release of Windows 11, the upgrade proposition for Windows operating systems was rather straightforward: you considered whether the current version of Windows on your system still fulfilled your needs and if the answer was ‘no’, you’d buy an upgrade disc. Although system requirements slowly crept up over time, it was likely that your PC could still run the newest-and-greatest Windows version. Even Windows 7 had a graphical fallback mode, just in case your PC’s video card was a potato incapable of handling the GPU-accelerated Aero Glass UI.

This makes a lot of sense, as the most demanding software on a PC are the applications, not the OS. Yet with Windows 11 a new ‘hard’ requirement was added that would flip this on its head: the Trusted Platform Module (TPM) is a security feature that has been around for many years, but never saw much use outside of certain business and government applications. In addition to this, Windows 11 only officially supports a limited number of CPUs, which risks turning many still very capable PCs into expensive paperweights.

Although the TPM and CPU requirements can be circumvented with some effort, this is not supported by Microsoft and raises the specter of a wave of capable PCs being trashed when Windows 10 reaches EOL starting this year.

Not That Kind Of Trusted

Although ‘Trusted Platform’ and ‘security’ may sound like a positive thing for users, the opposite is really the case. The idea behind Trusted Computing (TC) is about consistent, verified behavior enforced by the hardware (and software). This means a computer system that’s not unlike a modern gaming console with a locked-down bootloader, with the TPM providing a unique key and secure means to validate that the hardware and software in the entire boot chain is the same as it was the last time. Effectively it’s an anti-tamper system in this use case that will just as happily lock out an intruder as the purported owner.

XKCD's take on encrypting drives. 
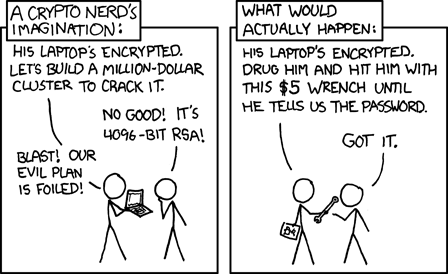
XKCD’s take on encrypting drives.

In the case of Windows 11, the TPM is used for this boot validation (Secure Boot), as well as storing the (highly controversial) Windows Hello’s biometric data and Bitlocker whole-disk encryption keys. Important to note here is that a TPM is not an essential feature for this kind of functionality, but rather a potentially more secure way to prevent tampering, while also making data recovery more complicated for the owner. This makes Trusted Computing effectively more a kind of Paranoid Computing, where the assumption is made that beyond the TPM you cannot trust anything about the hardware or software on the system until verified, with the user not being a part of the validation chain.

Theoretically, validating the boot process can help detect boot viruses, but this comes with a range of complications, not the least of which is that this would at most allow you to boot into Windows safe mode, if at all. You’d still need a virus scanner to detect and remove the infection, so using TPM-enforced Secure Boot does not help you here and can even complicate troubleshooting.

Outside of a corporate or government environment where highly sensitive data is handled, the benefits of a TPM are questionable, and there have been cases of Windows users who got locked out of their own data by Bitlocker failing to decrypt the drive, for whatever reason. Expect support calls from family members on Windows 11 to become trickier as a result, also because firmware TPM (fTPM) bugs can cause big system issues like persistent stuttering.

Breaking The Rules

As much as Microsoft keeps trying to ram^Wgently convince us consumers to follow its ‘hard’ requirements, there are always ways to get around these. After all, software is just software, and thus Windows 11 can be installed on unsupported CPUs without a TPM or even an ‘unsupported’ version 1.2 TPM. Similarly, the ‘online Microsoft account’ requirement can be dodged with a few skillful tweaks and commands. The real question here is whether it makes sense to jump through these hoops to install Windows 11 on that first generation AMD Ryzen or Intel Core 2 Duo system from a support perspective.

Fortunately, one does not have to worry about losing access to Microsoft customer support here, because we all know that us computer peasants do not get that included with our Windows Home or Pro license. The worry is more about Windows Updates, especially security updates and updates that may break the OS installation by using CPU instructions unsupported by the local hardware.

Although Microsoft published a list of Windows 11 CPU requirements, it’s not immediately obvious what they are based on. Clearly it’s not about actual missing CPU instructions, or you wouldn’t even be able to install and run the OS. The only true hard limit in Windows 11 (for now) appears to be the UEFI BIOS requirement, but dodging the TPM 2.0 & CPU requirements is as easy as a quick dive into the Windows Registry by adding the AllowUpgradesWithUnsupportedTPMOrCPU key to HKEY_LOCAL_MACHINE\SYSTEM\Setup\MoSetup. You still need a TPM 1.2 module in this case.

When you use a tool like Rufus to write the Windows 11 installer to a USB stick you can even toggle a few boxes to automatically have all of this done for you. This even includes the option to completely disable TPM as well as the Secure Boot and 8 GB of RAM requirements. Congratulations, your 4 GB RAM, TPM-less Core 2 Duo system now runs Windows 11.

Risk Management

It remains to be seen whether Microsoft will truly enforce the TPM and CPU requirements in the future, that is requiring Secure Boot with Bitlocker. Over on the Apple side of the fence, the hardware has been performing system drive encryption along with other ‘security’ features since the appearance of the Apple T2 chip. It might be that Microsoft envisions a similar future for PCs, one in which even something as sacrilegious as dual-booting another OS becomes impossible.

Naturally, this raises the spectre of increasing hostility between users and their computer systems. Can you truly trust that Bitlocker won’t suddenly decide that it doesn’t want to unlock the boot drive any more? What if an fTPM issue bricks the system, or that a sneaky Windows 11 update a few months or years from now prevents a 10th generation Intel CPU from running the OS without crashing due to missing instructions? Do you really trust Microsoft that far?

It does seem like there are only bad options if you want to stay in the Windows ecosystem.

Strategizing

Clearly, there are no good responses to what Microsoft is attempting here with its absolutely user-hostile actions that try to push a closed, ‘AI’-infused ecosystem on its victi^Wusers. As someone who uses Windows 10 on a daily basis, this came only after running Windows 7 for as long as application support remained in place, which was years after Windows 7 support officially ended.

Perhaps for Windows users, sticking to Windows 10 is the best strategy here, while pushing software and hardware developers to keep supporting it (and maybe Windows 7 again too…). Windows 11 came preinstalled on the system that I write this on, but I erased it with a Windows 10 installation and reused the same, BIOS embedded, license key. I also disabled fTPM in the BIOS to prevent ‘accidental upgrades’, as Microsoft was so fond of doing back with Windows 7 when everyone absolutely had to use Windows 10.

I can hear the ‘just use Linux/BSD/etc.’ crowd already clamoring in the comments, and will preface this by saying that although I use Linux and BSD on a nearly daily basis, I would not want to use it as my primary desktop system for too many reasons to go into here. I’m still holding out some hope for ReactOS hitting its stride Any Day Now™, but it’s tough to see a path forward beyond running Windows 10 into the ground, while holding only faint hope for Windows 12 becoming Microsoft’s gigantic Mea Culpa.

After having used PCs and Windows since the Windows 3.x days, I can say that the situation for personal computers today is unprecedented, not unlike that for the World Wide Web. It seems increasingly less like customer demand is appealed to by companies, and more an inverse where customers have become merely consumers: receptacles for the AI and marketing-induced slop of the day, whose purchases serve to make stock investors happy because Line Goes Up©.


From Blog – Hackaday via this RSS feed

view more: next ›