I think I've mentioned before that rural cyberpunk is just about my favorite setting and I always enjoy it whenever we get a glimpse. Gibson books are great for that, from Turner's brother's farm and Dog Solitude in the Sprawl, to the trailer park in the Bridge books, and basically all of the stub in The Peripheral. I love the way cyberpunk (realistically) rejects clean, fresh-start architecture and instead layers new over old, and I think rural areas provide even better contrast for that than the cities, despite how old some cities are. I've done a few rural cyberpunk scenes before, mostly for a webcomic. I love looking around my hometowns and trying to capture a type of location - not a specific place, but like an amalgamation of a category like 'farmhouse,' or 'junkyard,' and then adding kludged-on tech.
I made this one as location art for a Solarpunk TTRPG campaign book I've been working on. My goal was to show a sort of old-fashioned for the setting design that used a ton of old, scrapped-together tech. The farmer who lives here was a fan-favorite with my first group of players – he does a lot of work maintaining the meshnet for the mostly-abandoned town where the campaign takes place and he became good friends with the group’s hacker character.
His farm is pretty conservative for the setting. I wanted to play with how perspectives would shift in this utopian solarpunk setting, to have a farm that would seem both futuristic and kinda crunchy-progressive by our standards that would still be pretty stodgy and conservative compared to his neighbors.
He’s relying on biochar, crop rotation, and pollarded trees providing radial chipped wood to replenish his soil instead of manufactured fertilizer, using alley cropping and a handful of other agroforestry techniques to shelter his crops. He cooks his food using a scheffler reflector, drives a woodgas truck he uses to produce his biochar, and generates his power with a mix of solar, wind, water, and woodgas.
But compared to the elaborate food forests of a nearby community, Bob’s open fields and heavy reliance on tech makes his farm look downright traditional.
One of my goals for this region of the map was to explore the different ways one can arrive at some of these practices out of necessity. The people from this abandoned, rural town aren’t likely to be solarpunk ideologues but when supply chains broke down, the infrastructure collapsed, and the population emptied out, those who remained had to adjust to keep going. They look out for each other, grow their own food and generate their own power, and adapt their lifestyles to the seasons because that’s what they had to do to get by when things were bad. Bob is a bit younger than many of the other ‘holdout’ characters, but he’s generally following their mix of goals and motivations.
I find the sort of cyberpunk mix of scavenged tech and a traditional-looking farmhouse to be both a lot of fun and pretty much in line with the farmers I’ve known and worked for, who were happy to bolt new stuff onto old if it got the job done. Bob’s farm is full of scavenged robotics, radio antennas, and other tech, mostly controlled using cybernetics linked to his brain. He’s added a drone hangar to his barn and his UAVs swarm into the skies like bats while robotic tractors and hexapod gardening robots patrol his fields and guard his goats. He bolts solar panels, vertical turbines, electrical boxes, and radio antennas to his buildings with an almost punk focus on practical results over aesthetics.
Other elements also show his involvement in his community. In addition to maintaining the local scrapped-together communications network, he plays a big role in maintaining the town’s network of trials. He’s parked an old snow groomer, of the type used by ski mountains, under a lean-to attached to the barn. He uses this each winter to pack down snow on the town’s roads and trails, as most of them are seasonal, and people here travel by cross country skis, snowshoes, snowmobiles, or use vehicles modified with skis and tracks in the winter.
edit: Also huge thanks to the ham radio subreddit and the community on lemmy for looking over the antennas for me and making suggestions!

We recently switched to using a Linux Mint laptop with an adblocker for our streaming (while also cancelling a bunch of services). A friend at the recycling center set it aside for me - the screen was irreparably smashed but it was otherwise quite a nice little laptop. Replacement screens were too expensive so I carefully removed the broken one entirely so it'd default to the HDMI port and then set it up as a quick media center (we watch a lot of YouTube and the ads were driving me crazy, I might switch to a more purpose-built OS eventually). The TV is one I pulled from an ewaste bin to replace my previous ewaste TV after it finally gave up. It has a thin line through one edge of the screen occasionally but is otherwise fine. I also recently found a perfectly good wireless trackball mouse and a Bluetooth keyboard in the same bin where I got the TV (came with that other mouse). The bin even supplied HDMI cables. The whole thing is perched on a particle board TV stand I found like a decade ago when the college kids move out.

I stumbled onto this article while working on a photobash of a solarpunk scene. I think it does a good job of explaining the concept but there seems to be something wrong with its certificates, which might throw an error in your web browser. https://nwedible.com/urbanite-broken-concrete-retaining-wall-as-a-garden-feature/
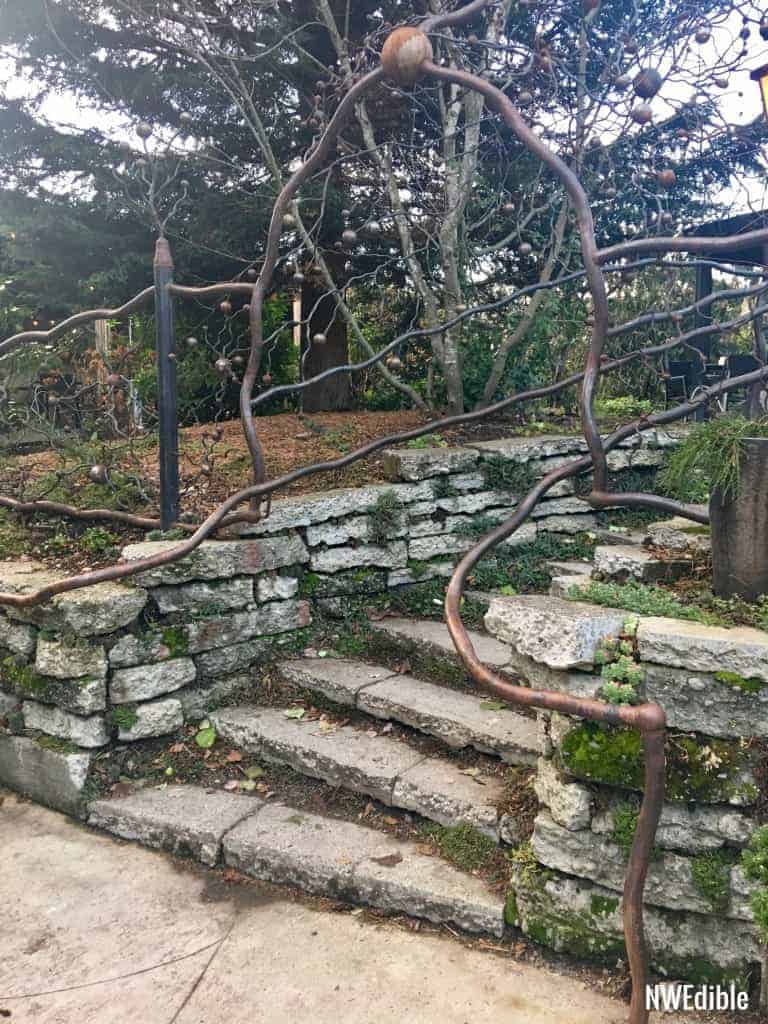
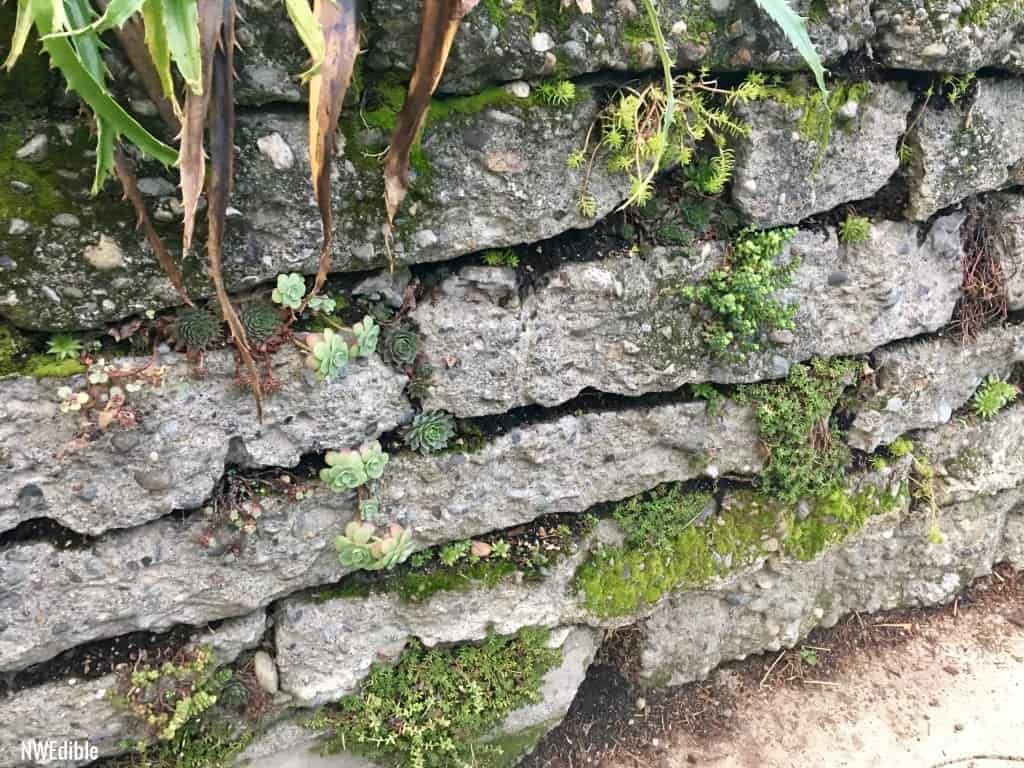
Just in case you don't want to check the link I'm also going to plagiarize a few quotes and images from the article:

"The marketing term for “old chunks of broken up concrete” is urbanite. Urbanite has a lot going for it: it’s durable and heavy like natural stone, reusing this product in garden and landscape design takes it out of the waste stream, it’s often a uniform thickness which makes it easy to stack or lay as a permeable patio surface, it’s often available in most urban locations, and it’s frequently free for the hauling. Free is good.
Drawbacks to urbanite can include potential contamination – this is more of an concern if your urbanite comes from a torn out commercial parking lot where all manner of auto fluids may have seeped into it than from the neighbor’s pool deck tear-out. Concrete itself can contain additives that might pose a health or contamination risk, although my feeling is that old, weathered concrete has probably already leached the worst of itself out somewhere else.
I probably wouldn’t use urbanite to build edible garden beds, but I can see great potential for turning this waste product in retaining walls, steps, and patio areas."


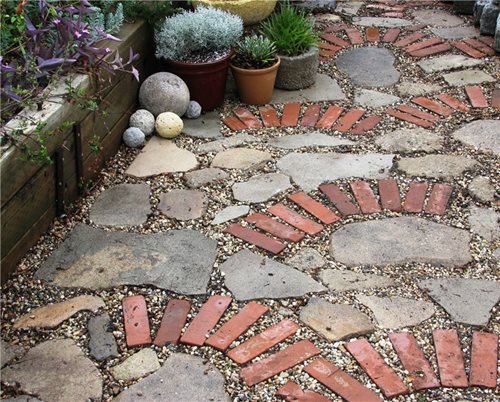
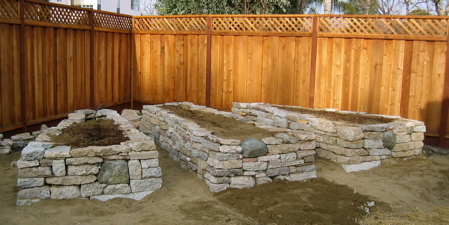
And a few examples of recycled concrete patios:


This last one came from https://www.terranovalandscaping.com/90/, which has a few other examples, including raised beds, so perhaps they knew their source of concrete was clean, or weren't worried about the potential for contanimation?

This is my first step-by-step post using our local movim microblog rather than imgur. I'll upload it to imgur later as a backup but I'm seriously impressed with movim, very glad to have a noncorporate place for my projects. Let me know if there's any issue with the link.
This is another quick one but at least I remembered to take pictures for most of it. I don’t enjoy oil painting as much as I do photobashes and other digital art, but it’s still a lot of fun in the right moment. I needed a picture frame for a recent one, to complete a gift to a relative. It was on a stretched canvas, rather than canvasboard, so the frame had to be deeper than normal. So decided to just make it from scrap lumber I had squirreled away.
I started with this stuff. These 1 ½” by 1 ¾” boards were part of a kind of disappointing haul I got from my local Everything is Free page. I don’t remember what it was I thought I’d find there, but by the time I got to it, all that was left was this tangle of busted-up boards from inside some kind of homemade builtin cabinet. They were cracked from their demolition, and full of wood screws, but I took them because there was still plenty of good material and I think I wanted to justify the trip.
I pulled all the screws and used them in another project, and when I went looking for material for the picture frame, they were pretty much perfect. Plenty of material, and I didn’t have to worry I’d use it for something better. The painting was of a rustic cabin, so the frame was going to be a bit rustic anyways, so a little battle damage was no big deal.
I measured and marked them based on a picture frame my grandfather had made (I would have used it instead but it wasn’t deep enough for the stretched canvas). I cut them to length, then down to 45 degrees on my miter saw (it makes squaring up lumber and doing corners absurdly easy, I used to do them all by hand and getting them to fit was much more art than science back then.)
Once I was looking at it, I realized the frame was a bit too thick, and decided to remove about half an inch in depth from the four pieces. This would be quick work on a table saw, but I don’t have one, so I marked a line and used the band saw. Then I sanded up all the sides on a belt sander until they looked good. There was a bit of stain left in deep spots from the original project, and I tried to keep some of it – I like a little character and history from the life of the piece. This wood was a part of someone’s home, they knocked it out with a sledge hammer, a weird goblin man came by on trash day and took it, now it’s a picture frame hanging on a wall.
Then I had to use the router to notch the back of all the pieces to hold the actual canvas. My router was a recent junk store find, it’s the old craftsman kind that’s a hand router bolted to the underside of a little fiberglass table. I screwed it to the workbench over the lathe, down on the far end, since its out of the way and that’s my heaviest workbench. I have plans to rewire the router, so you can turn it on and off with a proper tool switch, like I did for the drill press, but I haven’t done that yet, so turning it on meant reaching underneath, feeling for one of the handles, finding the trigger and the locking button, and setting them, at which point it begins to spin. It’s awkward and I wouldn’t want to have to do that in an emergency.
This was my first time really using a router on my own projects, so it wasn’t quite as pretty as I’d like, but overall it looks fine. I definitely want to replace the small, two-part fence with a taller one that runs end-to-end and gets closer to the blade. That would reduce the piece’s ability to wobble when its only braced against one of them.
Once the notch was cut I found the 45 clamp didn’t work that well so I stuck each joint together with a big dab of wood glue and a couple small dabs of super glue. The super glue gives you just enough time to get the pieces where you want them, and sort of acts as the clamping force for the wood glue, which takes much longer to dry.
Once it was dry, I stained the frame with Sedonia Red, it came out a sort of pink color but I think it’ll be a good fit for the white cabin with red trim in the painting, and the recipient can always hit it with a second coat of a darker stain if they choose.
The last step was to add a cable to the back. They make little metal picture frame hanger things, and I thought about just cutting and bending one from a soda can, but to be honest, I kinda hate those hangers. I don’t think they work well and they feel unreliable to me. Usually I just use a strand pulled from some damaged CAT 5 wire, but this time I happened to have this metal cable left over from… somewhere? I honestly can’t remember what it came from. But it’s the sort of thing I keep because it doesn’t take up much space and it’ll be useful eventually, and sure enough it was! The loops had already been cut, so I just drilled a hole through the little aluminum clamps at either end, used the vice to squeeze them down on the wire a little extra, and used them to attach the cable to the painting. I measured both holes from the top, and predrilled them with a thin bit to make driving in the nail easier (since I didn’t want to break the picture frame.
As a very last touch, I cut a tiny sliver of wood and glued it into a notch where the miter saw ripped out a bit of wood at the top left corner. A little stain blended that back in nicely.
Overall, not bad for my first picture frame. It’s a little rough, but it’s supposed to look that way.
cross-posted from: https://lemmy.dbzer0.com/post/14508843
Here is a map of current free stores in New York.
Also a similar project called the freecycle network lists towns across the world.
There's also Buy Nothing and Everything is Free

That's a really cool idea! Tbh when I asked the question I'd been thinking of the old 'oilskins' used by sailors in fantasy books (and history) which I think were sailcloth or canvas coated in tar, so this would actually be pretty close to what I had in mind.